![]()

Why Does DNA Move to the Positive Electrode?
Introduction
In the world of molecular biology, gel electrophoresis is akin to a high-stakes race where DNA fragments compete to reach the finish line—the positive electrode. But have you ever wondered why these genetic blueprints are drawn towards the positive end of the gel? It’s a fascinating question that unveils the intricacies of DNA’s structure and its interactions within an electric field.
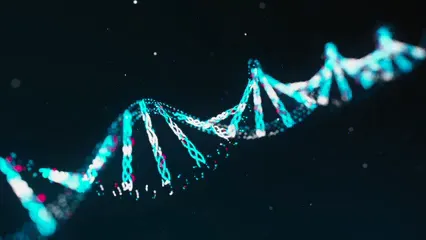
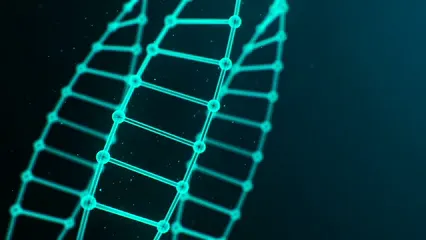
First, let’s talk about DNA. This molecule is like a twisted ladder, made up of rungs that are nucleotide bases, and its sides are formed by a sugar-phosphate backbone. This backbone is where the magic happens! Each phosphate group in this backbone carries a negative charge, making the entire DNA strand negatively charged. When we apply an electric field during gel electrophoresis, these negatively charged DNA fragments feel the pull toward the positive electrode, also known as the anode.
Electricity has a reputation for being a bit of a diva—it likes to take the path of least resistance! In this case, it’s not just any path, but one that leads to that sunny, positively charged electrode. The electric field causes the negatively charged DNA to migrate toward the anode while the positively charged particles (if present) head the other way, creating a clear and orderly race.
So, what happens when those DNA fragments meet the agarose gel? Picture a crowded dance floor where certain people can navigate easily while others get stuck. The gel acts like that dance floor, letting smaller DNA fragments glide smoothly while larger ones struggle to keep up. This separation process is important because it allows scientists to analyze the DNA fragments based on size, which is crucial for various applications in genetic research, diagnostics, and forensics.
In summary, the movement of DNA toward the positive electrode is a captivating interplay of negative charges, electric fields, and the physical structure of the gel. As we uncover the scientific principles behind this process, we’ll find that it has profound implications in the realm of genetic research and diagnostics. Buckle up as we journey through the electrifying world of DNA!
Understanding DNA and Movement Towards the Positive Electrode
What is DNA?
DNA, or deoxyribonucleic acid, is nature’s blueprint for life. This intricate molecule resembles a twisted ladder, known as a double helix. The rungs of this ladder are made up of nucleotide bases—adenine, thymine, cytosine, and guanine. The sides? Well, they’re formed by a phosphate-sugar backbone. Think of the phosphate as the glue holding the whole thing together.
Each nucleotide consists of three components: a phosphate group, a sugar (deoxyribose), and a nitrogenous base. The real kicker? The phosphate groups in the DNA backbone carry a negative charge. This charge is crucial during gel electrophoresis. When an electric field is applied, these negatively charged DNA strands are attracted to the positively charged electrode, also known as the anode.
So, why does this matter? The negative charge allows scientists to manipulate DNA in a lab setting. Imagine trying to push a magnet away from its mate—it’s a struggle! Similarly, the electric field creates a dynamic environment where DNA can move and be analyzed.
The Physics of Charged Particles
Let’s get a bit technical, shall we? At the heart of the DNA’s movement is basic electrostatics. You remember the old adage: opposites attract? That’s the essence of how charged particles behave. Negatively charged particles, like our DNA, are drawn to positively charged electrodes.
When an electric current flows through the gel, it creates an electric field. This field is like a highway for charged molecules. The negatively charged DNA heads towards the positive electrode while any positively charged particles, if they exist, would take a detour towards the negative electrode. This movement is not just random; it’s guided by the electric field’s direction and strength.
But that’s not all! The gel itself plays a part in this dance. Agarose gel serves as a sieve, allowing smaller DNA fragments to zip through while larger ones lag behind. Think of it as a crowded subway; the smaller folks (shorter DNA strands) can squeeze through the gaps, while the taller ones (longer strands) get stuck at the turnstile.
As the DNA fragments traverse the gel, they separate based on size, creating distinct bands. This is critical for researchers who want to analyze genetic material. So, when you see DNA moving towards that positive electrode, remember: it’s a combination of its negative charge, the electric field’s influence, and the gel’s physical properties creating a well-orchestrated migration.
In summary, the movement of DNA towards the positive electrode during gel electrophoresis is a captivating interplay of molecular structure and basic physics. This phenomenon not only highlights the unique characteristics of DNA but also illustrates the elegance of scientific techniques used in laboratories worldwide.

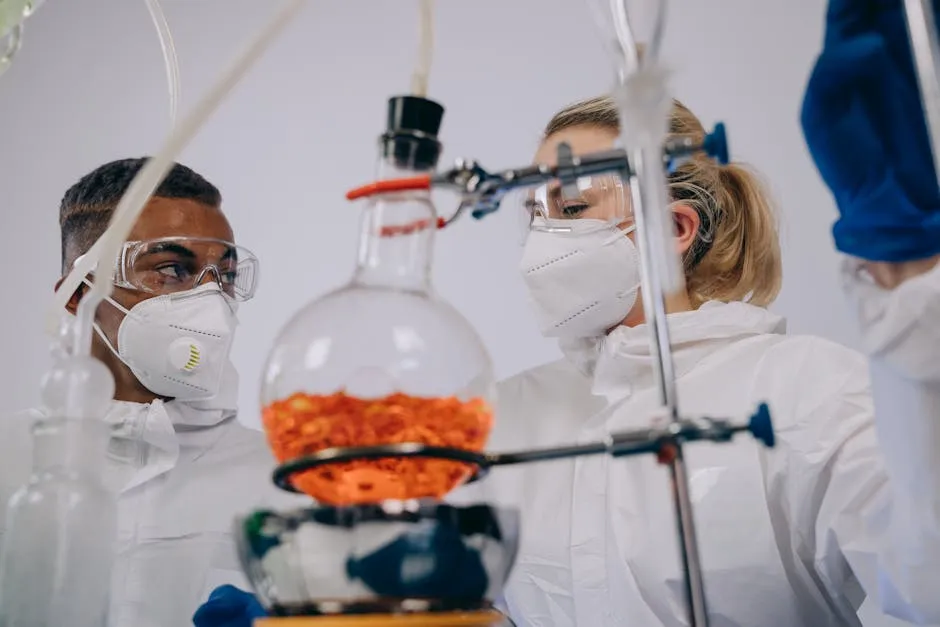
Preparation for Gel Electrophoresis
Preparing for gel electrophoresis is a bit like getting ready for a party. You want everything in place for a smooth event! Here’s a step-by-step guide to ensure your agarose gel and DNA samples are ready to shine.
- Gather Your Supplies: You’ll need agarose powder, electrophoresis buffer (like TAE or TBE), a microwave, a gel casting tray, and a comb to create sample wells. Don’t forget your DNA samples!
- Weigh the Agarose: The concentration of agarose is vital. For smaller DNA fragments (like those under 500 base pairs), use a higher concentration (around 2% to 3%). For larger fragments (over 1,000 base pairs), a lower concentration (about 0.7% to 1%) works better. Think of it as adjusting the size of a sieve!
- Mix Agarose and Buffer: Measure your agarose powder according to your desired concentration. Combine it with the electrophoresis buffer in a heat-resistant container.
- Heat Until Dissolved: Microwave the mixture until the agarose is fully melted, stirring occasionally to avoid hot spots. Caution! It can get hot, so use oven mitts.
- Cool and Pour: Let the melted agarose cool slightly before pouring it into the casting tray. Insert the comb to create wells, and allow the gel to solidify at room temperature.
- Prepare the Samples: While the gel sets, mix your DNA samples with a loading dye. This dye helps visualize your samples as they migrate through the gel.
- Load the Gel: Once the gel is solid, carefully remove the comb and place the gel in the electrophoresis tank. Fill the tank with buffer until it covers the gel. Load your samples into the wells, and don’t forget to include a DNA ladder for size comparison!
Selecting the right agarose concentration is crucial. Too high, and larger fragments will struggle. Too low, and smaller fragments won’t separate effectively. Finding that sweet spot is key for optimal DNA analysis.

Running the Gel
Now that your gel is ready, it’s time to run the show! Here’s how the electrophoresis setup works, complete with all the electric drama.
- Setup the Tank: Place the solidified agarose gel into the electrophoresis tank. Ensure the wells face the negative electrode. This way, the negatively charged DNA will naturally head towards the positively charged electrode.
- Connect the Electrodes: Attach the positive and negative electrodes to the tank. It’s like connecting the dots to light up the dance floor!
- Fill with Buffer: Pour buffer solution into the tank until it covers the gel. This buffer allows ions to move freely and helps carry the current.
- Apply Electric Current: Turn on the power supply, and watch the magic happen! The electric current creates an electric field, prompting the DNA to migrate towards the positive electrode.
- Observe Migration: As the DNA moves, you’ll see bands forming. Small fragments zip ahead, while larger ones lag behind, creating a beautiful array of bands. It’s like watching a race where speed and size matter!
- Timing: The duration of the run depends on the gel concentration and DNA size. Monitor the process closely. You want the bands to separate nicely but not run off the gel!
Once the run is complete, turn off the power supply. Carefully remove the gel for visualization. Get ready for the next exciting step!

Visualizing Results
You’ve reached the finale! Now, it’s time to visualize those DNA bands and interpret your results.
- Staining the Gel: Once the gel is removed from the tank, it needs staining to make the DNA visible. Ethidium bromide or SYBR Safe are common choices. These dyes intercalate with DNA, allowing it to glow under UV light.
- Use UV Light: Place the stained gel on a UV transilluminator. As the light shines through, the DNA bands will appear as bright spots, showcasing the separated fragments.
- Comparison with DNA Markers: To interpret your results, compare the bands against the DNA ladder loaded in one of the wells. This ladder contains fragments of known sizes, helping you estimate the size of your samples.
- Documentation: Take a picture of the gel for your records. This documentation is crucial for any analysis, presentations, or reporting.
By visualizing the DNA bands, you not only see the separation but also gain insights into the sizes of the fragments. This process is essential for various applications, including genetic research, cloning, and diagnostics.
In conclusion, preparing, running, and visualizing gel electrophoresis is an engaging process that opens the door to understanding genetic material. With the right techniques, you can unlock the mysteries hidden within DNA!
Applications of Gel Electrophoresis
In Genetic Research
Gel electrophoresis is a superstar in genetic research. This technique plays a vital role in sequencing, cloning, and genetic mapping. Let’s break it down!
When scientists sequence DNA, they need to separate fragments to read their order. Gel electrophoresis does just that! By applying an electric current, DNA fragments move through the gel, allowing researchers to visualize and analyze their lengths. This process is crucial for determining the sequence of nucleotide bases.
Cloning? No problem! Gel electrophoresis helps isolate specific DNA fragments. Researchers can cut out the desired DNA from the gel after separation. This isolated DNA can be inserted into plasmids or other vectors, paving the way for cloning experiments.
Moreover, genetic mapping involves creating a detailed map of genes on chromosomes. Gel electrophoresis aids in identifying the location of specific genes by comparing DNA fragments from different individuals. This information is invaluable for understanding genetic diseases and inheritance patterns.
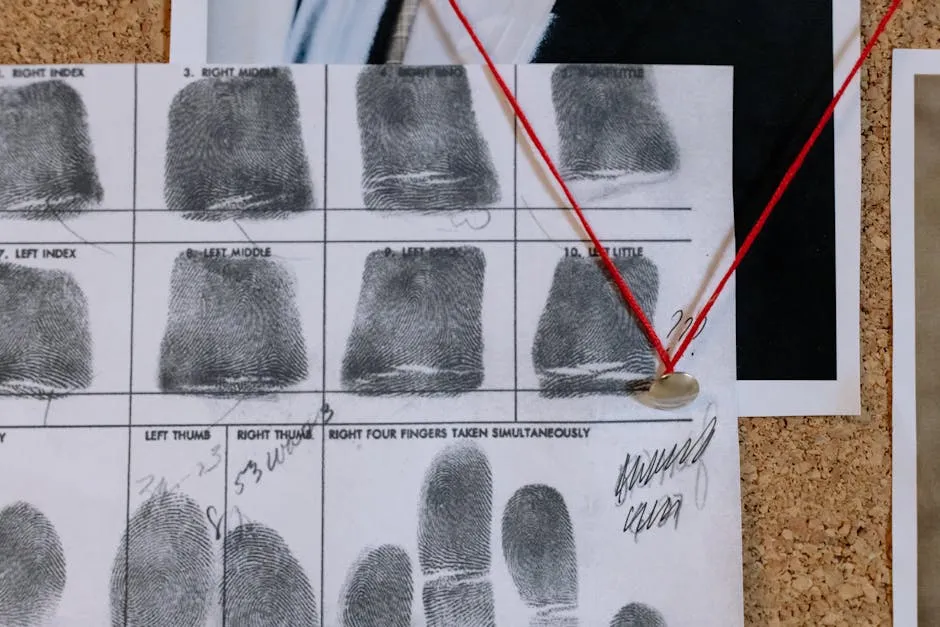
Forensic Science
In forensic science, gel electrophoresis is a game changer for criminal investigations. Think of it as a detective’s best friend! The technique is primarily used for DNA profiling, a method that identifies individuals based on their unique DNA patterns.
When a crime occurs, investigators can collect samples, like hair or blood. Using gel electrophoresis, they can analyze the DNA from these samples. The resulting DNA bands can be compared to a suspect’s DNA, helping establish or rule out their presence at a crime scene.
This method is not only accurate but also works wonders in cold cases. DNA profiling can provide new leads and help solve crimes long after they’ve occurred, making it a powerful tool in the quest for justice!
Medical Diagnostics
Medical diagnostics also benefit significantly from gel electrophoresis. This technique is instrumental in detecting genetic disorders and analyzing mutations. When a patient is suspected of having a genetic condition, doctors can perform tests involving gel electrophoresis.
For instance, researchers can examine DNA samples for mutations associated with specific diseases. By comparing the patient’s DNA bands with those of healthy individuals, they can identify any discrepancies. This information can guide treatment options and genetic counseling.
Additionally, gel electrophoresis is used to analyze mutations in cancer. By studying the DNA from tumor cells, scientists can determine the genetic changes driving the cancer. This knowledge is crucial for developing targeted therapies, enhancing patient outcomes.
Future Directions
Advancements in Electrophoresis Technology
The world of gel electrophoresis is evolving, and exciting advancements are on the horizon. Traditional methods are being complemented and improved by innovative technologies that promise enhanced efficiency and accuracy.
One notable advancement is the development of capillary electrophoresis. This technique utilizes thin capillaries instead of gels to separate DNA fragments. It offers higher resolution and faster results, making it ideal for high-throughput applications. Imagine analyzing multiple samples in record time!
Moreover, microfluidic devices are revolutionizing electrophoresis. These tiny chips can manipulate fluids on a microscale, allowing for rapid DNA analysis. Researchers can now perform complex experiments with minimal sample volumes, saving time and resources.
Looking ahead, the integration of gel electrophoresis with next-generation sequencing technologies holds great promise for personalized medicine. By combining these techniques, scientists can analyze an individual’s genetic makeup more precisely. This could lead to tailored treatments based on a person’s unique genetic profile, ushering in a new era of healthcare.
As we embrace these advancements, the future applications of gel electrophoresis seem limitless, opening doors to groundbreaking discoveries in genomics and beyond!

Conclusion
In conclusion, the movement of DNA toward the positive electrode during gel electrophoresis is fundamentally tied to the molecular structure of DNA and the principles of physics governing charged particles. Each DNA strand carries a negative charge due to its phosphate backbone, which is like a neon sign saying, “This way to the party!” When an electric field is applied, this charge creates a powerful attraction to the positively charged electrode, also known as the anode.
This intriguing phenomenon is not just a lab trick; it has significant implications across various scientific domains. In genetic research, for instance, gel electrophoresis serves as a foundational technique for analyzing DNA fragments. Scientists can determine fragment sizes, identify genetic disorders, and even engage in cloning endeavors, all thanks to this method. In forensic science, DNA profiling, made possible through gel electrophoresis, has transformed how law enforcement solves crimes, allowing for the identification of suspects based on genetic evidence.
As technology continues to advance, the applications of gel electrophoresis are expanding. Innovations like capillary electrophoresis and microfluidic devices promise to enhance the speed and efficiency of DNA analysis. This could lead to breakthroughs in personalized medicine, where treatments are tailored to an individual’s unique genetic makeup.
The capabilities of this technique are continually evolving, opening new frontiers in molecular biology and beyond. As researchers harness these advancements, the future holds exciting possibilities for genetic research, diagnostics, and even therapeutic interventions. The journey of DNA toward the positive electrode is just the beginning of a thrilling scientific adventure.

FAQs
Why is DNA negatively charged?
DNA carries a negative charge primarily due to its phosphate groups. Each nucleotide in a DNA strand contains a phosphate group that contributes a negative charge. This charge is crucial as it drives the movement of DNA during gel electrophoresis, allowing fragments to migrate toward the positive electrode. This unique characteristic enables scientists to manipulate DNA effectively in various applications.
How does the size of DNA fragments affect migration speed?
The size of DNA fragments significantly impacts their migration speed through the agarose gel. Smaller fragments can navigate the porous structure of the gel more easily and, as a result, travel faster than larger fragments. Essentially, the gel acts as a sieve; smaller molecules zip through while larger ones are slowed down, creating distinct bands based on size. This separation is vital for analyzing DNA samples accurately.
What are the common errors in gel electrophoresis?
Several common errors can occur during gel electrophoresis. One major issue is loading too much DNA into the wells, which can lead to smearing rather than distinct bands. Additionally, an uneven gel concentration can result in inconsistent migration patterns. Other mistakes include incorrect buffer preparation or not allowing the gel to solidify properly. Troubleshooting these issues is crucial for obtaining reliable results.
What other methods can be used for DNA analysis?
While gel electrophoresis is a staple in DNA analysis, other methods complement its capabilities. PCR (Polymerase Chain Reaction) is widely used for amplifying specific DNA sequences. Sequencing techniques, both Sanger and next-generation, allow for reading the exact order of nucleotides in DNA. Each method has its strengths, and choosing the right one depends on the specific goals of the research or diagnostic project.
Please let us know what you think about our content by leaving a comment down below!
Thank you for reading till here 🙂
Understanding why DNA moves towards the positive electrode is crucial in molecular biology. This article delves into the reasons behind this phenomenon.
All images from Pexels