![]()
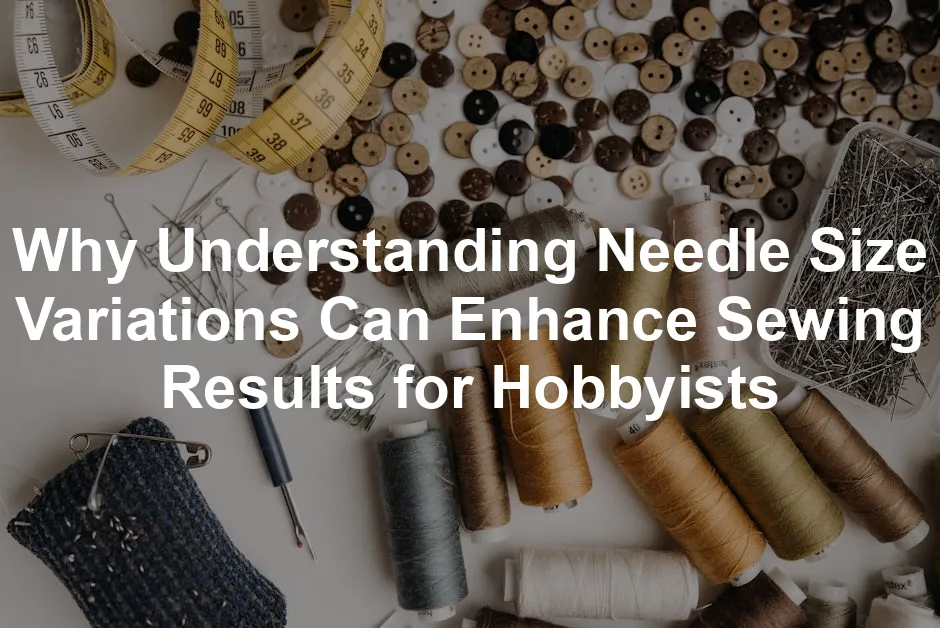
Why Understanding Needle Size Variations Can Enhance Sewing Results for Hobbyists
Introduction
Choosing the right needle size is crucial in sewing. It can significantly impact the quality of your projects. For hobbyists and enthusiasts, understanding needle size variations leads to better results.
Before you dive into your next sewing adventure, consider adding a Universal Sewing Needles Variety Pack to your toolkit. It’s like having a Swiss Army knife for needles, ready to tackle any fabric challenge that comes your way!
Understanding Needle Sizes
Needle sizes indicate the thickness of the needle and vary internationally. In the American system, sizes range from 8 (very fine) to 19 (very thick). Conversely, the European system uses numbers like 60 to 120, where larger numbers represent thicker needles. For example, a size 80/12 needle generally works well for medium-weight fabrics.
To visualize these sizes, consider a size chart. A smaller number, like 70/10, is suitable for lightweight fabrics, while a larger number, like 100/16, is ideal for heavyweight materials. Understanding these differences helps hobbyists select the appropriate needle for their specific projects, enhancing their sewing experiences and outcomes.
And speaking of sewing essentials, don’t forget to grab a Sewing Machine Needle Organizer. It keeps your needles sorted and accessible, so you won’t be rummaging through a chaotic drawer when you need that perfect size!
Importance of Choosing the Right Needle Size
Choosing the correct needle size is vital for sewing success. It affects how fabric and thread interact. Using the right needle ensures smooth stitching and prevents damage to your materials.
When your needle is too small, it might struggle to penetrate the fabric. This could lead to skipped stitches that disrupt your project. On the other hand, a needle that’s too large can cause unwanted holes and frays in delicate fabrics.
By selecting the appropriate needle size, you achieve a cleaner finish. It helps create professional-looking results that elevate your projects. Proper needle selection plays an essential role in the overall quality of your sewing.

Types of Needles and Their Uses
Universal Needles
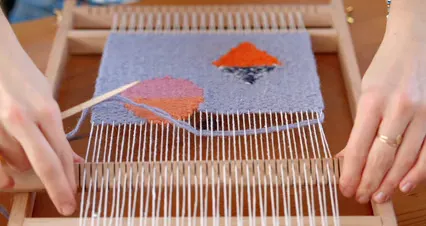
Universal needles are the go-to for general sewing tasks. They feature a slightly rounded point, making them suitable for both woven and knit fabrics. This versatility allows you to use them across a broad range of projects.
Common uses include sewing cotton, polyester, and blends. Universal needles come in various sizes, typically ranging from 60/8 to 90/14. For most medium-weight fabrics, a size 80/12 needle works best.
Specialty Needles
Specialty needles serve specific purposes, enhancing your sewing experience. Here’s a brief overview of popular specialty needles:
- Ballpoint Needles: These needles have a round tip designed for knit fabrics. They slide between fibers instead of piercing them, preventing snags. Use them for t-shirts, leggings, and other stretchy materials.
- Quilting Needles: Quilting needles have a tapered point for sewing through multiple layers. They are ideal for quilting projects, ensuring clean stitching on thick fabrics.
- Denim Needles: Designed for heavy fabrics, denim needles feature a sharp point to pierce through thick layers. Use them for sewing denim, canvas, or upholstery.
- Leather Needles: These needles have a wedge-shaped point, allowing them to cut through leather without tearing. They are essential for sewing leather goods and accessories.
- Embroidery Needles: With a larger eye, embroidery needles accommodate thicker threads used in decorative stitching. They help prevent fraying and thread breakage.
Understanding these needle types ensures you select the right one for your project. By matching the needle to your fabric, you enhance both the process and the final results.
And if you’re looking to keep your needles organized, consider a Sewing Needle Case. It’s a perfect way to keep your needles safe and sound, preventing the dreaded “lost needle” crisis!
Needle Size Recommendations by Fabric Type
Choosing the right needle size for your fabric can make a huge difference. Here’s a quick guide to help you select the most suitable needle size based on fabric weight:
| Fabric Weight | Needle Size |
|---|---|
| Lightweight | 60/8 or 70/10 |
| Medium-weight | 80/12 |
| Heavyweight | 90/14 or 100/16 |
Lightweight fabrics, like silk and chiffon, require delicate needles. A size 60/8 or 70/10 needle allows for smooth stitching without damaging the fabric. For medium-weight fabrics, such as cotton or polyester, an 80/12 needle strikes the right balance, ensuring strength and precision.
When working with heavyweight materials, like denim or canvas, opt for a 90/14 or 100/16 needle. These larger sizes can handle the thickness, ensuring clean stitches without skipping.
Understanding these recommendations helps you avoid common issues, such as skipped stitches and fabric damage. Selecting the right needle size for your fabric type enhances your overall sewing experience, leading to professional-looking results.
For those who love quilting, you might want to check out a Quilting Needles. They are designed for those intricate projects where precision is key!

The Anatomy of a Sewing Needle
Basic Parts of a Needle
A sewing needle has several key components. Each part contributes to its function in the sewing process. Here’s a breakdown:
- Eye: This is the hole where the thread passes through. A well-designed eye minimizes friction, helping prevent thread shredding.
- Shaft: The long, thin part of the needle varies in thickness. Thicker shafts are suitable for heavier fabrics.
- Shank: This is the upper part that fits into the sewing machine. Most needles have a flat side for correct insertion.
- Scarf: The indentation above the eye allows the machine’s hook to catch the thread, forming a stitch.
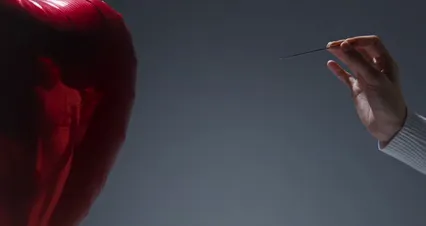
- Point: The tip of the needle varies by design. Different shapes, like sharp or ballpoint, cater to specific fabrics.
Understanding these parts helps you appreciate how each contributes to the sewing process. Choosing the right needle based on these features can improve your sewing outcomes.
How Anatomy Affects Performance
The design of a needle significantly impacts its performance. For example, sharp needles work best on woven fabrics, creating precise stitches. Conversely, ballpoint needles feature a rounded tip, making them ideal for knits. They push between fibers instead of piercing them, preventing snags and runs.
Additionally, the size and shape of the needle eye are crucial. A larger eye accommodates thicker threads, reducing the risk of breakage. For delicate fabrics, a smaller eye minimizes potential damage.
By understanding how needle anatomy affects performance, you can make informed choices. This knowledge will enhance your sewing experience, allowing you to tackle various fabrics with confidence.
Best Practices for Needle Selection and Maintenance
Selecting the Right Needle for Your Project
Choosing the right needle can make or break your sewing project. Start by considering the fabric type. Delicate fabrics, like silk or chiffon, require smaller needles, such as 60/8 or 70/10. For medium-weight fabrics, an 80/12 needle works well. Heavier materials, like denim or canvas, typically need a size 90/14 or 100/16 needle.
Testing on scrap fabric is vital. This helps you identify how the needle size interacts with the fabric. If you notice skipped stitches or fabric damage, try a different needle size. This simple test can save you time and frustration.
And while you’re at it, why not invest in a Sewing Needle Threader? It can save you from the headache of threading those tiny needle eyes, especially if you have less-than-stellar eyesight!
Maintenance Tips
Regular needle maintenance enhances your sewing experience. Change your needle after every project or after about eight hours of use. If you switch fabric types, it’s wise to change needles as well. Different fabrics have unique requirements, and using the wrong needle can lead to issues.
Store needles properly to maintain their quality. Keep them in a designated case, away from moisture and direct sunlight. This protects them from rust and damage. Label your needle types and sizes for easy access during your next project.
Troubleshooting Common Needle Issues
Incorrect needle selection can lead to several problems. Skipped stitches often occur with the wrong size or type of needle. If you experience this, check your needle size and consider switching to the appropriate one.
Puckering is another common issue. This often happens when the needle is too large for the fabric. Choose a smaller needle to avoid this problem. Additionally, if your thread keeps breaking, it may be due to a dull or damaged needle. Regularly inspect your needles and replace them as needed.
To prevent these issues, always match your needle choice with the fabric type. Understanding these basics will enhance your sewing results, making your projects smoother and more enjoyable.
Conclusion
Understanding needle size variations is essential for every sewing hobbyist. Choosing the right needle can drastically improve your sewing projects. It affects stitch quality, fabric integrity, and overall results. Don’t underestimate the importance of this small tool. Take the time to select the appropriate needle for each project. It can save you from frustration and ensure a polished finish.
For further reading, consider exploring resources that dive deeper into sewing techniques and needle types. Online tutorials, sewing workshops, or books can provide valuable insights. If you’re looking for some inspiration, check out a Sewing Pattern Book to get those creative juices flowing!

FAQs
What is the difference between needle sizes?
Needle sizes indicate thickness and vary by system. In the American system, sizes range from 8 (very fine) to 19 (very thick). The European system uses numbers like 60 to 120.
How often should I change my sewing needle?
Change your needle every 6-10 hours of sewing. Also, replace it when starting a new project or using different fabrics.
Can I use the same needle for different types of fabric?
It’s best to match your needle to the fabric type. Using the right needle prevents damage and ensures quality stitching.
What are specialty needles, and when should I use them?
Specialty needles include ballpoint, quilting, and embroidery needles. Use them according to the fabric type and project requirements for optimal results.
Why does needle size matter in sewing?
Needle size impacts stitch quality and fabric integrity. The wrong needle can cause skipped stitches or fabric damage.
How do I determine the correct needle size for my project?
Assess your fabric weight and type. A quick guide is to use smaller needles for lightweight fabrics and larger needles for heavier materials.
What are the signs that I need a new needle?
Common indicators include skipped stitches, fabric snags, or uneven seams. If you notice these issues, consider replacing your needle.
Please let us know what you think about our content by leaving a comment down below!
Thank you for reading till here 🙂
All images from Pexels